Objective
The project will focus on image processing technique. We will work on a simulator of a sticker machine on computer. Users can input an image in computer or through a webcam. After loading the image into the system, users can enrich the image by inputting text or filling up the background with funny cartoons or objects. Finally, users can choose to output the image as a file or print the image out. For printing the images out as sticker, the system provides a template which is in a well defined size for users to place the images. For more advance function, user can use the webcam to capture several images continuously and edit each image. User can choose to output as a gif file which combines the edited images together.
Functions
- Input Image
- Load Image from Folder
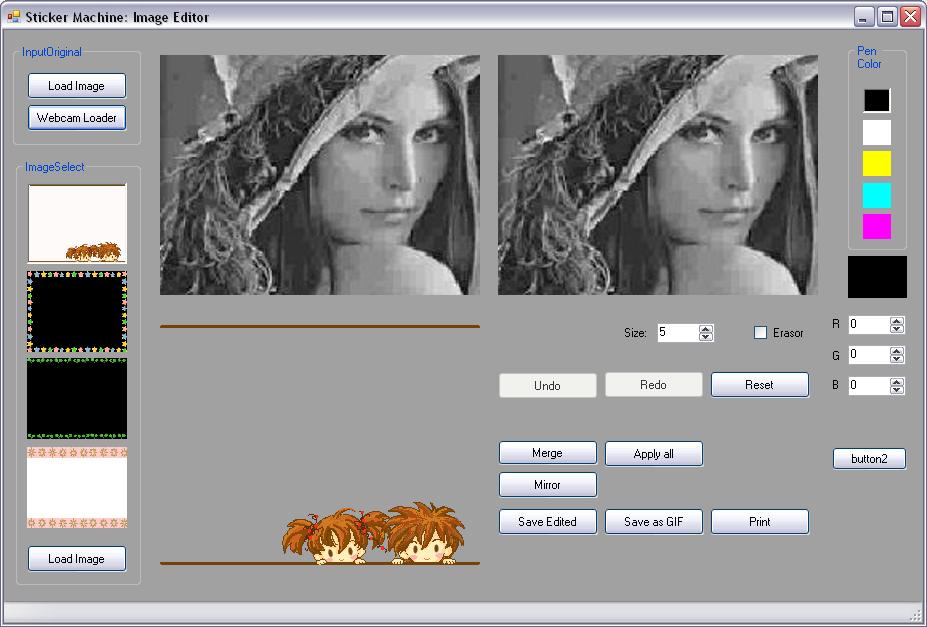
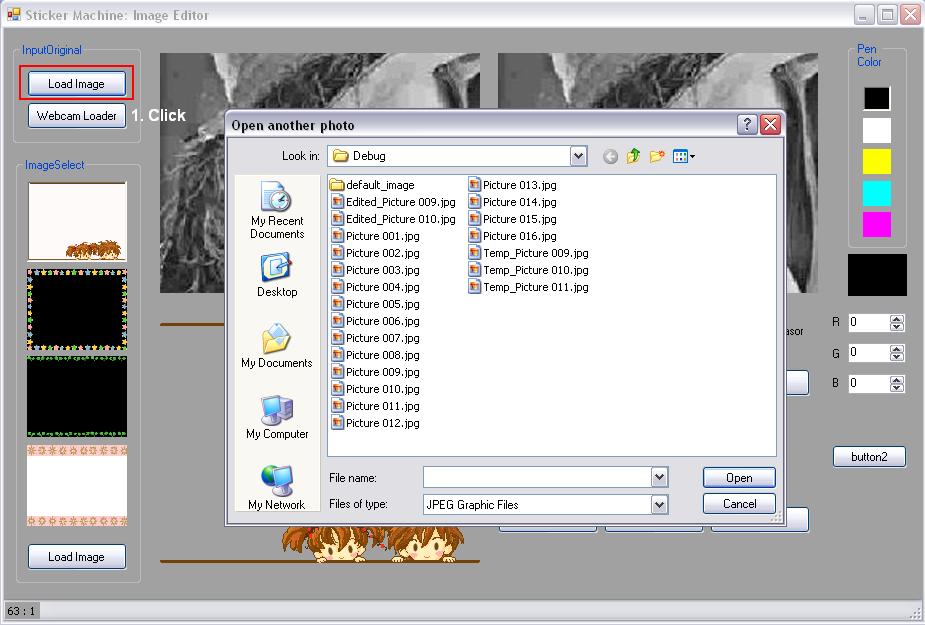
Click the "Load Image" button in the Image Editor interface. A file explorer will be prompted up. User can use the image they want and the image will show in the original image box of the Image Editor interface. - Capture Image from Webcam
Click the "Webcam Loader" button in the Image Editor interface. The Webcam loader interface will be prompted up. After input the number of photo that the user wants to capture (default number is 1), click the "Capture" button of the Webcam Loader Interface. The machine will capture one image every 3 seconds. Click the "Finish" after all images are captured. The users can load the image and edit it in the Image Editor interface.
- Load Image from Folder
- Image Processing
- Merging Objects
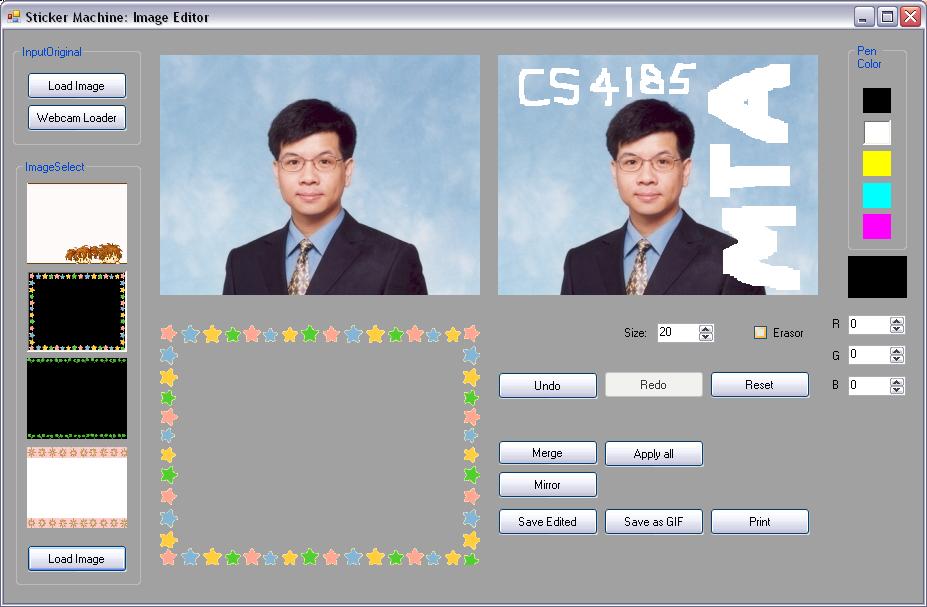
User can perform merging photo frames or icons from provided image or loaded custom image from the computer. For loading image from computer, user click "Load Image" and an open file dialog will be prompted. Selected image will be show on the image box.
When user want to perform merged, click on the image box to select the transparent color. Then click "Merge" button, image in the image box will be added to the resulting image. If user does not select the transparent color before click "Merge", system will set the first pixel of the image as the transparent color.
User can click "mirror" button to get the horizontal reflected photo frame or icon.
If user want to apply the resulting effect to the all the current captured photos, use can click "Apply all" button. - Free Drawing
User can choose the pen color in the right column. Click on the resulting image box to start drawing, and then perform another click to finish drawing. Besides the default color, user can choose by adjusting the R, G, B values of the pen color.
- Merging Objects
- Output Image
- Save as JPEG
The machine generates three types of JPEG file under its directory - Save as Animated GIF
Click the "Save as GIF" button of the Image Editor interface. The machine will combine last set of edited images to form an animated GIF file under its directory. - Print Out Hardcopy
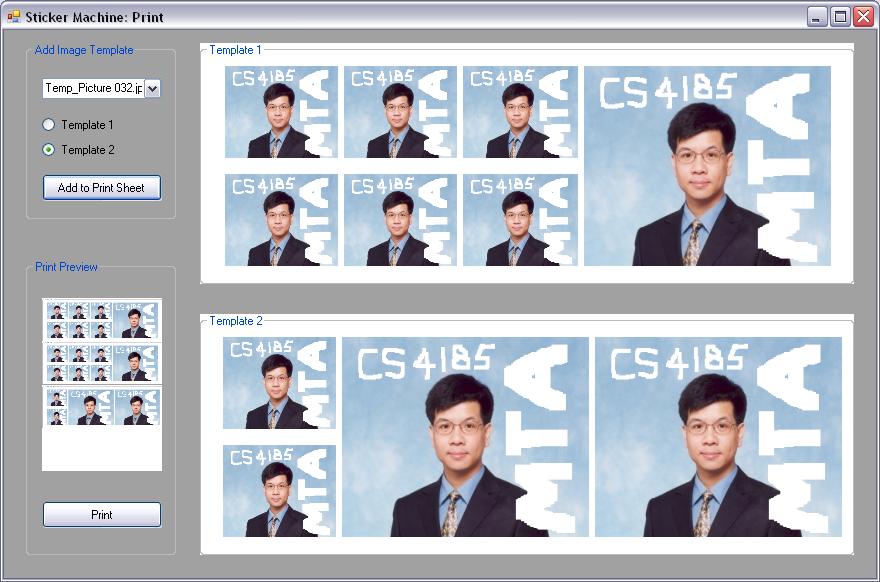
Click the "Print" button of the Image Editor interface. The Print Template interface will be prompted up. User can choose the image that he/she wants to print from the drop down list box (only the Temp_Picture 00X and Picture 00X_Edited JPEG file name can be chosen). Users can choose to print either Template1 or Template2. After clicking the "Add to Print Sheet" button, the Print Preview which in A4 size will show the added template. After adding 4 templates or clicking the "Print" button of the Print Template interface, the machine will call the window print function for printing.
- Save as JPEG
Interface
- Click to enlarge the image -
This is the main interface of the sticker machine simulator.
- Free drawings
- Paste background
- Paste icon
- Save edited image
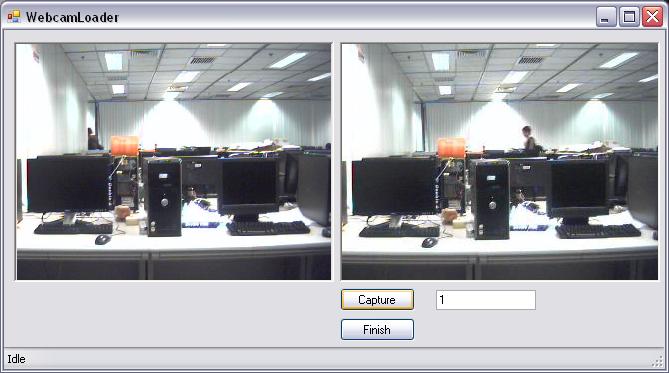
Webcam loader. Capture still image(s) for editing.
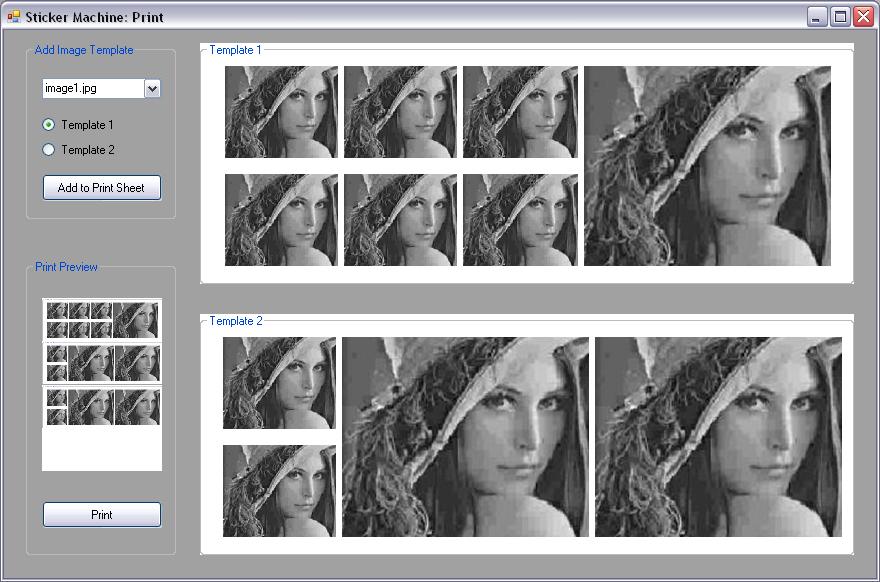
Interface of choosing template for printing.
Instructions
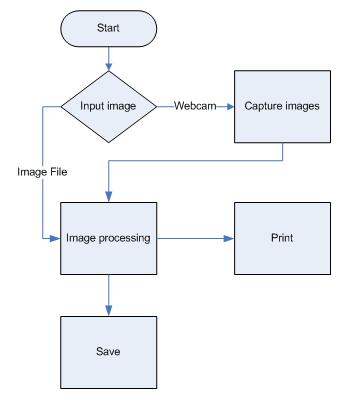
Simple workflow diagram
Scenerio 1: Edit a image on disk and print the work.
Scenerio 2: Capture a set of images by webcam and save as animated gif.
Scenerio 1: Edit a image on disk and print the work.
Step 1: Load an image from disk.
Step 2: Edit image by drawing.
Step 3a: Save the image (Click the "Save Edited" button on the main interface) for later processing.
Step 3b: Print the image and select the template.
Scenerio 2: Capture a set of images by webcam and save as animated gif.
Step 1: Capture multiple images by a webcam.
Step 2: Edit image by drawing.
Step 3: Click "Apply All" to apply changes to all images you've captured at step 1.
Step 4: Save the image as gif (Click the "Save as GIF" button on the main interface).
Tools
Software: MS Visual Studio 2005
Language: C#
Hardware: Webcam
 Copyright © 2006-2007, MTA Group 4 Team, All Rights Reserved.